How to Choose the Best Ecommerce Product Photo Editing Service Provider?

e-commerce product photo editing

The modern digital era has changed business styles; now, people do their businesses virtually through eCommerce techniques. With the increasing popularity of eCommerce, photo editing service providers’ demand also increases.

You can grow your business rapidly by presenting your attractive product photographs virtually. But you will need high-quality, appealing images to attract your customers. In this case, opting for an eCommerce Photo editing company would be the right solution to get high-quality product photos.

All photo editing services are not the best. You can’t just rely on what they are saying. To choose the best Product Photo Editing service, you should consider some essential factors. I will tell you about some of the necessary elements that will assist you in choosing a professional product photo editing service provider.

Things to consider for choosing an eCommerce product image editing service:

e-commerce photo editing

1. Consider the experience

There is no price for an experience; experience has excellent importance in photo editing, like every technical task. You may find an inexpensive product photo editing service. But it does not mean getting your work done by a company that also ensures quality images.

In today’s eCommerce, photo editors have started providing product photo editing with little experience.

Here you are at risk; they can harm your business without experience. So before choosing any e-commerce photo editing service, ensure it has enough experience.

Ask them to provide their previous work or show their portfolio. If you are in a hurry and want an experienced Photo editing service provider, you can try clippingpathuniverse.com.

2. Check their skills

product photo editing service

You may find an experienced product photo editing service, but it is also essential to check out their skills. First, you should analyze what retouching product photography skills you need. Once you have examined the required skills, ask them to show what skills they offer.

It isn’t significant to deal with a company that does not have the skills according to your requirements. Regarding photo editing for eCommerce photographs, different skills are required for retouching other products.

So, only hire a company which offers similar services as you require. It will help you get the perfect quality product photos you need.

3. Consider Photo editing Quality

affordable clipping path service

Before hiring an e-commerce photo editing provider, check out the quality of their edited photos. You can go to their website to see their photo editing quality.

You will not just check the quality of their images but can also know about their considerable skills and how proficient they are.

If satisfied with their edited images’ quality, you can place the order. Your careless dealing will result in unwanted poor-quality photos.

Poor quality eCommerce image editing could be a big hurdle for your product marketing. You will not just face a drop in the sale but also risk losing old clients.

4. Check out independent Reviews

e-commerce photo editing

You may get some satisfaction by visiting their website or seeing their portfolio. But in the current scenario, very few companies and sites are trusted.

They use different fraudulent techniques to dodge others. You may read the reviews about a product retoucher company on its website, but these reviews are usually fake.

It would be best to read the independent reviews to ensure a good eCommerce photo editing company. You have several ways to ideally check independent reviews. You can ask questions on different social media pages or discussion forums.

Visit forums to get honest and quick reviews about any eCommerce photo editor. It will increase your trust, but it is not enough to consider only one platform; you should check out three to four forums.

5. Customer Support

photo editing for eCommerce

A good company delivers quality work and has great care for its customers. They offer support whenever a customer faces an issue. The clients always appreciate the helpful and quick response. But for, the digital photo editing service has more importance. The client needs to contact the company multiple times with the company to get the required editing quality.

So never forget to check out the customer support when choosing a product image editing company. It will save you time and will also keep you relaxed. You can check them by sending a message for help; if they contact you instantly and provide helpful information, the company’s customer support service is satisfactory.

6. Secure services

When dealing with new companies, there is the risk of privacy. Your essential data could be exposed to your competitors if the company is untrusted. So before placing your order, make sure you have chosen a reliable product photo editing service.

Ask them to tell you about their security and how much security they offer. How will they use the provided information? For your security purpose, please sign the bond with the company. I will recommend you to choose the company in your city or in a nearby city where you can visit.

7. Check out their Method

Experienced photo editors know many ways and issues for fantastic photo editing. But every way is not reliable; product photo editing is not just editing. It is your company’s marketing tactic. You can increase your brand awareness and sales revenue if you have good-quality photos on your website.

Ask them to tell you about their Method for eCommerce image editing. Always prefer professional and updated techniques when selecting a reliable company for editing your natural photos.

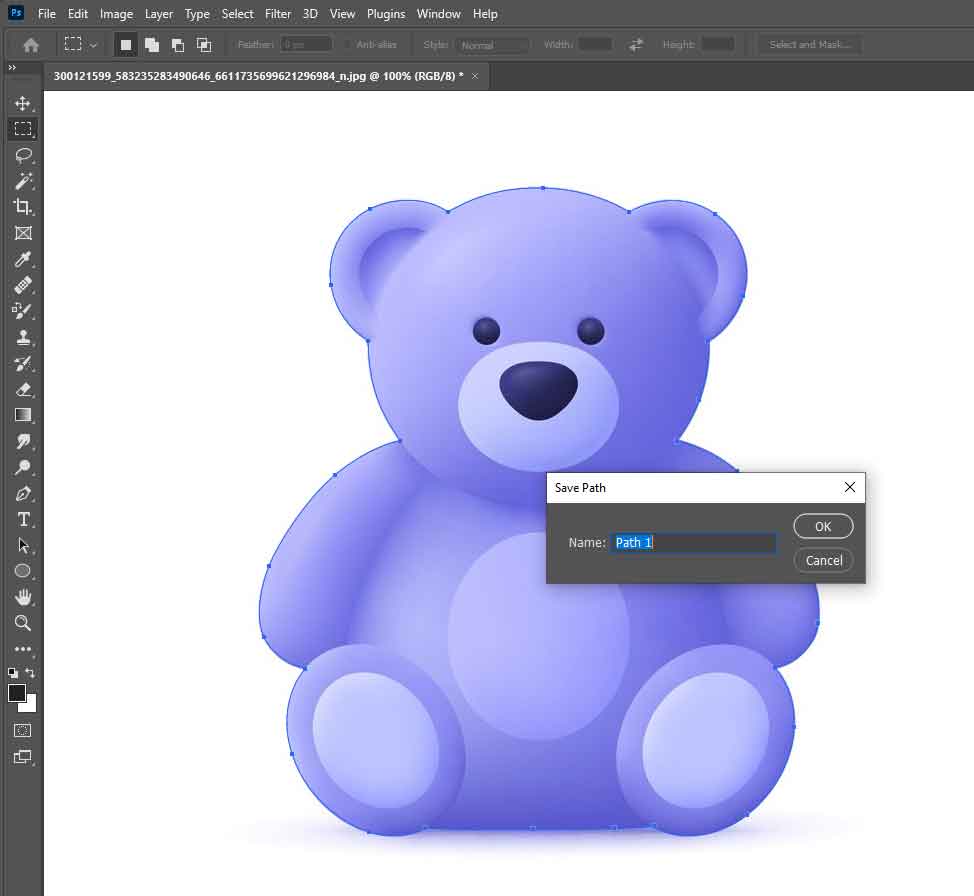
Some photo editors use the shortest methods to edit the photos, but the shortest methods never bring satisfactory results. Modern, high-quality tools like Adobe Photoshop are the best options for Photo editing. Never hire a company that uses free software.

8. Delivery time

Undoubtedly, high-quality photo editing takes more time, but it does not mean it takes weeks or months. When choosing an eCommerce photo editing service, always check the delivery time. Make sure their delivery time is adjusted within your requirements.

If the company is committed and agrees to deliver your work within the targeted time, you can hire them; otherwise, look for other options. Never be shy; tell them very clearly about the fast delivery time. Please bind some conditions with on-time delivery.

9. Consider their Photo Editor

It would be best if you considered several things about the editors of a company. You can ask them how many photo editors they have. What skills do their photo editors have? How experienced are their photo editors and much more?

There are many global and overseas service providers in this sector. You can easily find them through google. A good photo editing service provider must have a good production team. After knowing their number of editors, you will better understand on-time delivery. By learning their experience, strategy, and skills, you can better understand what quality images you will get.

10. Price

Price is also an essential factor when choosing an e-commerce photo editing service. You will find hundreds of companies that are offering cheap prices. There are also many companies that offer expensive rates. Which company you want to hire depends on your price range.

When hiring a professional e-commerce photo editor, do some work before negotiating the price. You can check the market trend regarding the price. After knowing the prices, you will be better positioned to intervene. Do not hire the cheapest or most costly; always offer the average cost to get an affordable clipping path service.

11. Terms & Conditions

Never forget to ask them to tell you their terms and conditions. You can search for their terms and conditions on their website. A professional eCommerce company’s eCommerce site always mentions its terms and conditions to protect its customers’ rights.

After reading their terms and conditions, you will be better positioned to negotiate with them. You will better understand what your rights are and what responsibilities you have. It will protect you from many ambiguities.

12. Ask for a Trial

Professional photo editing companies also offer free trial choices for a couple of pictures. Never skip to utilize the free trial; it will help you understand what you will get. You can place your order if you are satisfied with their free trial delivery. Payment after delivery.

Frequently Asked Questions

Why an eCommerce Image editing service?

High-quality Real Estate photography represents your brand and can convey your business message.

A good quality image could attract new customers to your products. Nowadays, modern eCommerce techniques make it compulsory for every business.

Why should you prefer the Photoshop tool?

Photoshop tool comes with advanced photo editing services that ensure the delivery of transparent images, background removal, color correction, shadow creation, spot retouching, ghost mannequin, and more. If you are looking for an Amazon photo editing service, you will not find a better choice than Photoshop to get images according to amazon policy.

What to expect from a Product Image Editing Service for E-Commerce?

A photo editing company for eCommerce products will edit your product images in many ways.

They will remove the background with a transparent background. An editor will add or remove the essential or unnecessary parts and objects in a picture.

Final Thoughts

Photo editing services are becoming a demand of every business. Many new eCommerce photo editing service providers have entered the market with the increasing demand for photo editing.

They can spoil your images, which leads to a decrease in sales revenue. So, before choosing the product photo editing service, you should consider some necessary things to ensure you have chosen a reliable company.

We have also guided you with 12 essential factors. But if you still feel confused, you can take the direct negotiation of clippingpathuniverse.com.

What is Clipping Path in Photoshop?

What is Photoshop Clipping Path? If you are new to the idea, don’t worry, you have come to the right place. We will explore the Clipping Path in-depth in this tutorial. Everything you need to know about the Clipping Path and how to utilize it in Photoshop is covered in detail in this guide. We will discuss the differences between Clipping Path and Image Masking since most people conflate them. A thorough step-by-step method for designing a clipping path will also be covered. For aspiring designers, this is quite useful.

The more experienced users can also learn something new from this guide, even if it is geared toward novices. Are you now prepared to discover what a Clipping Path is? Let’s get started.

What is the Clipping Path?

You must first understand what Clipping Path is in its most accurate form. In any photograph, you can use this procedure to either delete the background or replace it with a white one.

Using the Pen Tool Clipping Path function, you may draw a shape or a specific vector path to isolate a particular area of an image. This is an excellent method for erasing background from a photograph. Additionally, you can crop an image to only edit a small size using the Clipping path.

Designers recognize numerous Clipping Path varieties. You may either use the simple way of using the Pen Tool to draw a path around an image, or you can use the Clipping Path to perform far more complex tasks like dividing a picture into multiple parts and using each portion independently in a snap. Use clipping path techniques to get a smooth edge when you want to remove the background from an image.

Clipping Path vs. Image Masking

Many people confuse the Clipping Path and the Image Mask in Photoshop. The truth is that they are very different from each other. Let’s explore how Image Masking and Clipping Path differ from one another.

Both Image Masking and Clipping Path are effective Photoshop tools. They can assist you in separating an image’s foreground from its background. But their methods vary.

Pen Tool is used by Clipping Path to erase the background. Image Masking, on the other hand, uses three different techniques to change specific areas of an image. Alpha Chanel Mask, Layer Mask, and Clipping Mask are all types of image masking. They can alter more than just the background because they use various techniques.

clipping path tutorial

Clipping Path is preferred when the foreground image has sharp edges and is easily separated from the background. Compared to Image Masking, it takes longer because you have to use the Pen Tool to trace a path around the image.

Graphic designers frequently employ Clipping Path and Image Masking to inject some personality into their creations. In Photoshop, they may be used to merge many layers and photos to produce some very gorgeous posters, logos, and online images.

How to Create a Clipping Path in Photoshop:
One of the most popular Photoshop techniques is the clipping path, which may significantly enhance your designs. You can learn more by using our step-by-step tutorials if you are familiar with this.

Step 1: Open the Image
Open the image you want to clip from in the first step. Navigate to File > Open to make your selection from the image. You may see this image in the Layers Panel, which will appear on the background layer.

Step 2: Select Your Tool

What must now select the Pen Tool from the toolbar? It is easy to identify because the emblem resembles a pen. To create a Clipping Path around the image, use this tool. To choose the device, you can also press the shortcut key “P.”

Step 3: Create a Path

A Clipping Path can be made around the image using the Pen Tool. Keep at it even though it takes a little while. To complete the image path, add anchor points. If you make any mistakes, you can also eliminate anchor points. In the Paths Panel, you can see the way it is created.

Step 4: Save the Path
Once you have created the path with the Pen Tool you have to save it. Go to Paths Panel and find the path you have drawn. Double-click it, then select Save Path. You can call it whatever you like and save it.

Step 5: Cut the Path
Go back to the Paths Panel and display the menu. The “Clipping Path” option should be found. Your image will be changed into a Clipping Path as a result.

Click “OK” while leaving the flatness value blank. You can adjust this value in the future, but for now, you can leave it at 0, and there won’t be any issues.

Step 6: Save as EPS

The image can now be used without the background once you have established a Clipping Path. However, you must first save it as EPS. Select the format EPS from the selection list under Save As.

Step-7: Use the Image

You can use this image in your photographs without a background. This EPS file can be opened in Adobe products, including InDesign, Illustrator, and Photoshop.

Clipping Path: Where Can It Be Used?

You must be eager to try it now that you understand how to make a Clipping Path in Photoshop. The background of an image can be eliminated with this method. The Clipping Path in Photoshop, however, allows you to do a lot more.

Clipping Path can be used to enhance the appearance of your product photos. This is a great approach to clear the background of clutter and draw attention to the goods. Using Clipping Path might be helpful if you own an online store.

Clipping Path is a beautiful tool for editing logos, images, and illustrations in graphic design. These images can be used to create beautiful things like posters, packing, pictures, and other things. Graphic designers can benefit significantly from clipping paths.

Use Clipping Path to Create Beautiful Banners and Images for Your Websites to Make Your Banners and Web Images Stand Out. The Clipping Path can add a wide range of images to your website and attract users.

Use in Image Editing: Clipping paths can also be helpful when editing photos or images. You can use it to mix various photographs and step up your editing abilities. Using this method, you may eliminate the background and give the picture another vibe.

Lastly, Photoshop can use Clipping Path to create stunning interior and architectural ideas. This method might be beneficial if you want to impress your clients.

These were a few applications for Photoshop Clipping Path. Once you understand how to use this skill correctly, you can accomplish much more.

Conclusion Photoshop Clipping Path feature can be pretty helpful for graphic designers. You can use it to make some original designs and enhance the beauty of your work.

We hope you found this tutorial to be helpful. We went into great depth on Clipping Path. The step-by-step manual can be an excellent resource for novices searching for a simple guide to Clipping Path. We also discussed many applications for the Clipping Path in designs.

But you need to continue learning and practicing to become an expert. Clipping Path is easy to understand, but mastery takes effort and a desire to try new things.

References
https://en.wikipedia.org/wiki/Clipping_path
https://www.clippingpathuniverse.com/

ABOUT THE AUTHOR

Towab Muhammad Yusuf

This is Towab Muhammad Yusuf Creative Content Writer and SEO Specialist at Clipping Path Universe. We provide 100% handmade photo editing services using Adobe Photoshop. Clipping Path Universe – An Offshore Graphic Design Company Providing Clipping Path, Color Correction, Photo retouching, Car photo editing, Drop Shadow, Raster to Vector, and Image Manipulation Services. Quick turnaround. The payment is not required until the clients are delighted with their work…

How to be a freelancer with Photo editing skills?

There are many people who want to be a Photo editor with a lot of skills. Then to upgrade their skills they attend many pieces of training as well. Some of getting jobs in many companies and some of choosing the freelancing for income money by photo editing.

You can also read How to be a photo editor without a degree.

Well now take a look at 

what is freelancing?

Freelancing is when you get work by online and you work from home, finish their work in the targeted time and deliver that work online. And they pay you in a bank account or credit card. That total dealing process is done online. 

There are too many paying methods for freelancers such as Paypal, bank account, any kind of dual currency card, etc. The Clint can be from your country or others county.

Do you want to know What is the difference between a layer mask and a clipping mask?

What type of skills do you need to be a photo editing freelancer?

There many types of photo editing and you can choose whose types as your profession. Here I am going to describe a little about photo editing services.

Photoshop skill

Photoshop is software with which anyone can do any type of photo editing. So you can take training upon this if you want to be a successful photo editing freelancer. 

Skils in clipping path

This is the best part of the photo editing service. This is the most common editing service as well. The clipping path is clipping a product photo or materials and changing its background or take that product to another surface. 

Why is the clipping path cost-effective?

Background removal

Background removal is a great service. If anyone wants to change the background of their photos they will deal with you if have good skill in this.

Photo retouching

There are many people who want to make their photos neat and clean. So, Photo retouching is a process of this. With photo retouching, you can remove the dirk circle and the negative sides of a photo.

There are also photo editing services like wedding Photo editing, Headshot retouching, wild photo editing, etc. so you can grab some skills from this and be a successful photography freelancer. 

What are the sectors for find a Photo editing freelancing job?

There are many online places for freelancers. With some easy steps, they can find freelancing jobs. The sectors are:

Freelencer.com

It is the easiest and the largest platform for making your profession as a freelancer. First, you have to make a proper profile and attach your skills files to your profile. And then search for photo editing work and bit for work. then the client will send you SMS if they select you. They have a Mobile app for easy use.

Fivrr

 It’s also a big place for freelancing. Like before description here you also have to make a profile. That can be liked by clints. And then request for work.

People per hour

On this site, the clients will search you if you make a proper profile with your working skills descriptions. And after submitting work they will pay you hourly basis.

So there are also have many working fields like those sites. You can make your own website to express yourself so well to the clients and add your experiences. Hope this blog will help you with your skills.

And also read How to Get a Clipping Path Job?

How to become a photo editor without a degree?

Becoming a photo editor is a lucrative freelancing career. The world of photo editing is stunning, but it is also complicated.In most of the cases you will use a photo editing software like Photoshop. That means you have to acquire the skill and techniques to reach a photo on a given instruction.To become a successful photo editor for getting hired by someone doesn’t always need a degree.

Here in this blog, I always try to provide insightful tutorials on photo editing like clipping paths. However, today I am going to provide a guide on how you can become a photo editor without any degree. You can also read about difference between layer mask and a clipping mask

Photo editing career: What does it mean to become a photo editor?

You can take photo editing as a full-time or part time job.By editing pictures, everyone can make money.

Photo editing is a skilled discipline with applications in a variety of fields. You will practice photo editing on some well-known photo editors and then use the talents to make money from them.

Photo editing skills can be used for earning:

  1. Print Media
  2. Photography
  3. Video Editing
  4. Web page Designing
  5. Product Image Designing


How to become a photo editor without a degree?

Image editing is a part of the work in a few areas. On Google, you can find more similar job opportunities.

In addition, professional knowledge of photo editing tools and how to use it for photo editing is a must for these occupations.

On YouTube, there are several Photoshop tutorials. You can begin by learning the fundamentals, and then progress to more advanced techniques for image editing.
Work, practice, practice are the words that come to mind when thinking about how to improve your skills.
This may include doing volunteer work or devoting all of your spare time to honing your skills. It’s worthwhile to do so.

Make a name for yourself by marketing and branding it. It’s important to remember that you’re promoting a service.

Now you may need to know about types of Clipping path in Photoshop

Upwork is a freelancer-focused website. Create an account and clients will recruit you once you believe your job is up to scratch and marketable.
Don’t underestimate the influence of word of mouth. Don’t wait for customers to approach you; tell your friends and family that you have a niche.
They’ll spread the news, and if you’re doing a decent job, customers will flock to you.

Still want to be motivated. Photography, like every other profession, is constantly changing. You must keep growing and going forward in order to remain in company.

Any of the best photographers and editors in the world can be found on sites like Behance. Follow their lead and set a high standard for yourself!

You actually see what has to be done while you’re a Photo editor. You probably had an idea of how the photograph could appear until it was finished before you took it. It can be as simple as a few minor edits to get there, or it can be more complicated at times.

You can read more about Photoshop clipping path tutorial. And how you can change a image background.

Final Words

I won’t argue over where the boundaries of photo editing are because that isn’t the point of the question.

Often keep in mind the meaning and creative vision while editing. I’ve seen a lot of over-edited photos that were technically flawless but lacking meaning and aesthetic merit. It’s necessary not to make editing a priority.

Alos read Why is the clipping path cost effective?

What is the difference between a layer mask and a clipping mask?

In this article, I will explain the difference between the layer mask and the clipping mask.

When you are starting a learning clipping path, this may make you confused.

Let’s start by explaining their definitions. Later, I will write about the difference.

Layer mask

So, what are layer masks exactly? Are you puzzled by the word “mask”? Replace it with “transparency,” and that is just what a layer mask achieves.

Layer masking is a reversible technique for concealing a part of a layer. This gives you more editing opportunities than erasing or cutting a part of a layer.

Layer masking can construct image composites, cut out objects for inclusion in other documents, and restrict edits to a specific part of a layer.

It enables you to change the transparency of a layer. That’s the only thing there is about it. They aren’t anything more than that.

Clipping Mask

A clipping mask is a group of layers that have had a mask added to them. The bottom layer or base layer defines the group’s apparent borders.

Assume the bottom layer contains a shape, the layer above it contains an image, and the top layer contains the text.

Clipping masks are a powerful technique in Photoshop for manipulating the exposure of a layer. In this respect, clipping masks are identical to layer masks.

However, though the end product is the same, clipping masks and layer masks do not yield the same results.

Assume the bottom layer contains a shape, the layer above it contains an image, and the top layer contains the text.

If the image and text only appear from the form outline in the base layer, they inherit the base layer’s opacity.

Only layers that are next to each other may be grouped. The group’s base layer’s name is shown, and the thumbnails for the layers above it are indented.

The clipping mask symbol can also be seen on the layers above it.

What is the difference between a layer mask and a clipping mask?

Clipping masks, like layer masks, allow you to cover parts of an image, but they are made with several layers, while layer masks only use one. A clipping mask is a shape that hides other artwork when exposing what’s inside it.

But wait, there’s a catch. The Opacity setting changes the transparency of the entire layer at once.

When the Opacity level is set to 50%, the whole layer becomes 50% translucent.

In certain instances, this is perfect, but what if you want a part of a layer to be transparent?

What if you like the left side of the layer to be fully translucent while the right side is visible, with a steady transition between the two in the center of the layer?

That’s a common thing to do with a Photoshop layer, allowing you to fade from one picture to another.

As previously said, you can’t do that with the Opacity option because it just helps you monitor the brightness of the whole layer at once.

What you’d like is a way to monitor the transparency of various areas of the layer independently. It would be necessary to use a layer mask.

Why is the clipping path cost-effective

Why is the clipping path cost-effective?

Clipping path is one type of photo editing service that helps to make a photo good-looking, changing its background, and attaching another something to make that picture glamorous. Most of the time clipping path used for product photography to make the product photo unique and clear.

In the starting of any product related or photography business, they need to market their samples in a new way. At that time they need photos unique and attractive so that customers can choose their service and product as well. They used to edit their photos by themselves or outsource. The clipping path is cost-effective than other photo editing sectors. So you can choose a clipping path service so that you can grow your business with your targeted time.

Why will you choose the clipping path?

Clipping path is a simple service for editing a photo. In Photoshop editors use a pen tool for the path of the indicated subject then they make that background as your recommended color. The most preferred color is white because the object gets more visibility on white background. There are many outsourcing services where you can edit your photos. You can also learn about clipping path remove the background 

Clipping path is the only way with which you can edit your photo in your budget. So if you want to get the best quality photo in your cheapest budget so you can choose a clipping path. There are many type of clipping path in Photoshop

Where can you get the cheapest service?

There are many outsourcing clipping path services. If you want the best service and don’t want to compromise with the quality of your photos you may select a medium pricing service. Sometimes they offer low-cost service with editing your photos. So you have to search for these types of services. For your help, I am giving you some services name for the best clipping path service at a low cost:

Clipping path universe

This is the best for clipping path service. They cost $0.35 for clipping path service. And they will take care of your picture quality so well as you want.

Clipping path India

They do the clipping path well. They cost $0.49 USD-$11.99 USD per photo.

Offshore clipping path

They are also a clipping path service provider company. They take $0.29 per photo for clipping paths.

Creative clipping path

It’s also another clipping path company. They take $0.49 in basic clipping path service.

Fiverr

If you want a person for clipping the path of your photos you can visit the Fiverr website and choose a graphics designer. They want different costs as their demand.

Conclusion 

Clipping path is a Photoshop technique for removing the background of photos. There are many clipping path services and ways for clipping your photos. Image masking, photo retouching background removal is also the type of photo editing but if you want to edit your photos at a low cost you can choose a clipping path service. Clipping path is more simply service than other services so that it’s cost-effective for everyone. You can read about how to get a clipping path job

Photoshop Clipping Path Tutorials to Remove Background [Video]

Background removal means changing the background of an image. Maybe the where you are clicking a photo that is not so good or you need to change passport size photo for submitting at a site or working place. So you need to remove the background. There are many service apps or software for changing backgrounds. Services use a clipping path to remove the background.

Clipping path change the background

Steps for clipping path and remove background :

  • You can use adobe photoshop and another photo editor software for clipping the path of a photo. 
  • You can select a photo in which you want to change the background by clipping the path. So you can choose multiple photos for work.
  • Then you have to zoom in that photos and use pen tools as well
  • For doing this buy your own you have to use of pen tool first. Press CONTROL+CLICK  for the path.
  • Then you can see the line of the clipping path. 
  • Select the Layer menu+new+layer via copy 
  • The image becomes the second background for changing background 
  • Add pure white as your background.

Then you can change the image in your main file. If you want to learn about the type of clipping path in photoshop you can read this article. you can learn more about the clipping path in illustrator. If you are a professional graphics designer clipping path job suggestion is also for you.

Photoshop save eps with clipping path

[Solved] Photoshop Save EPS With clipping path?

Saving in eps format is in the third position when it comes to formatting. The format EPS is a charter organizing agreement. EPS stands for An encapsulated PostScript.

The designer made this format for keeping graphics view, which you can use through Sub-Script Printing machines. Now the question is does photoshop save eps with clipping path?

How to Save Clipping Path in EPS File Format in Photoshop

If you are doing a clipping path job online, you will need to learn this technique. Because there will be clients who prefer EPS over JPEG or PSD.

Now, you can quickly isolate particular parts of an image. Changing the layer is not required, as Photoshop makes this possible.

From any point, you can tweak the photo without undoing the edits. It will take only a few seconds.

There was a time when people need to save multi-tone images. For saving silhouetted images with a clipping path, the EPS format is necessary. 

The system of keeping in EPS format is a traditional way of saving images. After the upgrade came to Adobe Photoshop, you can save all kinds of images in any format. 

So, the EPS saving format has become a kind of option. Many of you know about the vector arts. Vector mainly talks about dimension and direction.

For saving vector shape layers, you can also use Photoshop EPS format. After saving vector data, you will see the keen boundary to a Sub-Script printing machine.

If you are doing clipping path in Adobe Illustrator or CorelDraw .EPS file format can be found when you are saving the files.

Hence, if you draw any types clipping path in photoshop, you can follow this tutorial.

When you go to open the EPS folder inside Photoshop, all the data will become re-raster. It will make the shape soft, preventing it from becoming sharp.

The Photoshop EPS options will show you the Preview option at the beginning. It helps you to create a low-resolution preview, which you can for printing the non-PostScript printers.

Then you will see the Encoding option after preview. It tells you how the data delivers to the PostScript printers. Those who are commercial printers always go for this format.

They already know which option will suit their PostScript processor. But usually, the default option works in most cases. 

Typically, you can do vector art correctly using Adobe illustrator. Clipping a vector art in illustrator is much easier than in Photoshop. 

Saving the Vector art in EPS from illustrator is the same process as done in Photoshop. Now, saving in EPS format has become more comfortable because they have upgraded Adobe Photoshop.

Aside from the Vector art, images of any type can be saved in EPS format using Photoshop. Clipping path is now used everywhere for editing photos.

The clipping mask function is not only done with illustrator but also done with Photoshop. So, you can save the Clipping mask photo in EPS format in Photoshop.

Clipping path through the Paths panel method

  • At first, you need to insert an image from your desktop in Photoshop. From the main toolbar, select the Pen tool and draw the isolated picture through the border edge.
  • After completing the drawing over the image:
  • Go to the Layers palette, then choose the Paths panel.
  • At the top right corner of the panel, select the triangle shape icon. You will see the option “Save Path.”
  • Click it.

The same drop-down menu selects “Clipping Path,” which will make the appearance of a new dialogue box. After the esurient of path selection, press ok.

Final Verdict

At last, you need to save the clipping path to your current Photoshop project. To do that, click the menu from the main file. 

You will observe lots of options in front of you. Select the “Save As” option and choose “Photoshop EPS.” Thus, photoshop saves eps with clipping path through Paths panel method.

How to do Clipping Path in InDesign

In a full single art piece, you will observe many various sub-art merged within a beautiful background. Now taking a particular piece of art from that whole piece, one needs to do cropping. But cropping things can include the scene. 

So, for excluding the background layer, the designer has introduced a clipping path. Here you will come to know how to do clipping path in InDesign.

Clipping Path InDesign Tutorials

Apart from other Adobe tools, InDesign is somewhat different. But it is much easier to use a clipping path in InDesign rather than using Photoshop.

This technique is demandable and you can easily find a job on clipping path.

NOW,

Most arts in InDesign are within the frames. So, you can consider them as built in tools as a clipping mask. It is possible because you can easily separate structures and contents.

To start clipping the mask at first, keep the shape and image in the same layer. In InDesign, you need to always start from the container and filling.

For a text to clip mask in InDesign, you need to convert the text into shape. There are three ways you can clip-path a design in InDesign.

  • If you have a saved design with a mask line, then InDesign can use it directly in auto command mode.
  • For generating a clipping path for an art piece that you saved, you can use the Detect Edges option in the Clipping Path command.
  • You can also use the manual form of clipping path that most of us use in other Adobe software. Using the pen tool to the surrounding of a design, then pasting it in the command is the traditional way to clip-path any art.

Doing a clipping mask in InDesign  

  • Click on File will generate lots of options—select Place to import the image which you like to upload. Then press open to load the image in InDesign.
  • A round disc shape object will appear in the middle of the image. By holding that disc, you can drag the image internally from the frame. Besides, in InDesign, you can clip the edges of the picture by using the Transform Tool.
  • A default rectangle frame will appear after the loading of the image. You can select any shape for the edge if you want.
  • Then select the area towards the particular art which you want to clip with your desire tool.
  • Using the selection tool, click on your marked area. Go to the edit option and select the cut tool from that box. Cutting is better than copying the image, which prevents you from getting confused.
  • After cutting the marked image, again click the edit option and select the Paste Into option.
  • Thus, you will get your desired clipping path image with your chosen frame.

Moreover, you can also create a clipping mask using customized Frame Shapes. Through the Pen tool, you can also make some complex shapes if you want to.

The vector drawing is more comfortable with using a pen-tool. Clipping path in InDesign makes you mask multiple arts with your desired frame tools.

You can clip any format in InDesign easily after importing from your desktop. From Jpg to EPS format, the clipping path of any images is possible through InDesign.

Conclusion

So, after photoshop and illustrator, adobe created InDesign to cover both the editing software. Thus, if you follow the above procedure serially, you can easily clip-path in InDesign. Therefore, read carefully to know “how to do clipping path in InDesign.” Besides, you can learn about the Illustrator clipping path.

Type Of Clipping Path

Type Of Clipping Path in Photoshop

The demand for clipping paths is increasing day by day. Basically, it is a part of the image editing tool.

In this e-commerce era, people need to clip their images for various reasons, suppose someone wants his/her image should be on the beach but his image in the room, for this reason, he can clipping his photo.

Again some companies need background removal images for their company so that they can use them for their product then clipping can happen over here.

That means clipping path is an essential part of e-commerce business, online shop, photographers, and many others.

Image Source: Clipping Path

Basically, image editing professionals or experts do clipping path of an image by photoshop, and the pen tool is a sector of this photo editing tool.

And we all know about photoshop this is one of the best photo editing tools on earth, and this tool is so popular for editing any image, most professionals use this tool for its unique feature.

Type Of Clipping Path

When you are selling or outsourcing clipping path services, the types of clipping path in Photoshop will be helpful.

It’s the standered way to set the pricing of clipping path services. The types of clipping path is mainly dependent of three matrices-

  1. Complexity – If the complexity is higher the hire price category will apply.
  2. Require time to finish job – the amount of time is important.
  3. Expertise – The level of expertise it required to create a clipping path, in photoshop.

Finding clipping path job is essential. And the types of clipping path is also benefitable.

There are different types of clipping path. Here I am discussing the types of clipping path :

Manual or basic clipping path :

It is probably the easiest type of all. In this, a solitary path is drawn and the item is removed from the picture and the background is taken out. In this, just a single path is an attractive request to get the ideal outcomes.

It is applied to straightforward items that have lesser curves and edges.

Multiple clipping path :

Basic clipping path

There are different kinds of masking cycles of the clipping path. Multiple clipping paths is one of them.

As the title shows, clipping the multiple paths of a picture characterizes the multiple clipping paths. It is a lot of trouble contrasted with the typical clipping path.

This is commonly utilized for bigger objects having more than one item or item. For each item, a path is to be made which can be tedious also.

Complex clipping path :

The Complex path is the hardest kind of clipping path than accomplishing more than 100 clipping paths. In a complex clipping path, each and every path should be made cautiously to remove the background or cut out a picture.

It needs high focus as a slip of the hand can destroy the outcomes totally. It is extremely troublesome and in this manner, proficient assistance is needed to perform.

What Types of Clipping Path Do You Need?

The latest photography and editing are changed in so many ways. So, it is hard to tell what types of editing or clipping path that a photo needs with out observing it.

Vastly, the price will be equal to the time a photo needs to be clipped. The more complex it is, the more time it will take. If you are about to start your photography career, you may or may not have the experience in pricing.

Now, it can be easy if you have knowledge on photo editing.

Final Words

However, These three are the common type of clipping paths. Some experts or writers are classifying clipping paths into many types. 

Depending on the software it used to create a clipping path can be a generic classification. Like clipping path in InDesign or Illustrator.